Using the NFC API
Non-standard
This feature is not on a current W3C standards track, but it is supported on the Firefox OS platform. Although implementations may change in the future and it is not supported widely across browsers, it is suitable for use in code dedicated to Firefox OS apps.
This API is available on Firefox OS for privileged or certified applications only.
NFC (Near Field Communication) is a short range radio technology used to exchange data between mobile devices by tapping them together, or momentarily holding them close by. This article describes how to make use of the Web NFC functionality available in Firefox OS via the NFC API, including registering to use NFC and creating, receiving, and sharing data.
Note: The NFC API landed as a certified/internal API in FirefoxOS v2.0, however it had several design problems and possibly security issues, so we refactored it and made it available as a priviledged API in FirefoxOS v2.2 (bug 1042851). This documentation mainly covers the new version available in Firefox OS 2.2; for the Firefox OS 2.0 NFC API only P2P sharing is supported; you can grep the Gaia 2.0 source code for onpeerready to see how the API is used in Gaia apps there (Browser, Contacts, Music, Video, and Gallery.)
Working NFC API Examples
Note: These have not been updated to use the shared NFC Utils library to handle formatting and parsing NDEF data. New code should use NFC Utils as a basic starting point.
The contacts app uses NFC P2P Functionality for sending and receiving vcards. Look at gaia/apps/communications/contacts/js/nfc.js. In Firefox OS 2.2, there an app called nfc-api-test, which contains all the samples for using NFC API.
There are also multiple Gaia unit tests available for testing NFC functionality, for example gaia/blob/master/apps/system/test/unit/nfc_handler_test.js. Search the Gaia repo for more.
Registering the NFC web activity
To use Web NFC, then first thing you need to do is register the nfc-ndef-discovered web activity in your app's manifest.webapp. For example, the following shows how you would use url as a filter for the Web Activity, if you just wanted to share URLs via NFC:
{
    ...
  "activities": {
    "nfc-ndef-discovered": {
      "filters": {
        "type": "url",
        "url": {
          "required":true, "pattern":"https?:.{1,16384}", "patternFlags":"i"
         }
      }
    }
  }
    ...
}
You can then set the activity handler in the standard way:
navigator.mozSetMessageHandler('activity', handlerFunction);

// Example handler to get the URL from the activity.
function handlerFunction(activity)
{
  if (activity.source.data.type == 'url') {
    var url = activity.source.data.url;
  }
}
It's very useful to import the shared NFC Utils into your application. In your main HTML file, you can add this to your html <head>:
<script defer src="shared/js/nfc_utils.js"></script>
Permissions
Next, you need to set permissions in your manifest.webapp, as required by the app's NFC usage. For full read/write permissions, you need this:
"permissions": {
  "nfc": {}
}
Or if you just want to share information but not write anything:
"permissions": {
   "nfc-share": {}
 }
Note: In FirefoxOS v2.0 the permission was "nfc-read": {} and "nfc-write": {}, depending on what you wanted to do. The permissions were changed as of Firefox OS 2.2, to make the transition to privileged status easier (see bug 1048676.)
Working with NFC tags
In this section we will cover possible ways to work with NFC tags.
Getting a MozNFCTag object
The first step is to get a MozNFCTag object, which represents the physical tag. MozNFCTag allows you to read NDEF data from the physical tag or write NDEF data onto the physical tag.
navigator.mozNfc.ontagfound = function (event) {
  var tag = event.tag;
  console.log(tag instanceof MozNFCTag); // should print true
}
Reading a MozNFCTag
Next, you need to read the MozNFCTag object — this is done using the MozNFCTag.readNDEF() method, which forms a request. onsuccess. This returns an array of MozNDEFRecord objects.
MozNDEFRecord is the object that implements NDEF — as defined in the NFC Forum specs. The data stored in the MozNDEFRecord object is raw data represented by an unsigned byte array ( Uint8Array ) , whereas the data received from the Web Activity handler is a JavaScript DOMString. Hence, conversion is necessary.
// tag is an instance of MozNFCTag
tag.readNDEF().then(records => {
  // records should be an array of MozNDEFRecord.
});
Writing data to an NFC tag
Here is an example of writing a URL on the NFC tag.
// using NfcUtils from shared/js/nfc_utils.js to create data to write on tag
var tnf = NDEF.TNF_WELL_KNOWN;
var type = NDEF.RTD_URI;
var payload = NfcUtils.fromUTF8('\u0003mozilla.org');
var ndefMSG = [new MozNDEFRecord({tnf: tnf, type: type, payload: payload})];

// tag is an instance of MozNFCTag
tag.writeNDEF().then(() => {
  console.log('Data written to tag!');
});
Sending data to peers via NFC
With your data ready to be sent, you can now get references to peers that come into range of your device, and choose to send them the data.
Registering the onpeerfound callback to react to peers
When the content is ready to be shared, you need to register the mozNfc.onpeeready callback, which will be called once another P2P device is in proximity.
navigator.mozNfc.onpeerfound = function (evt) {
  ...
};
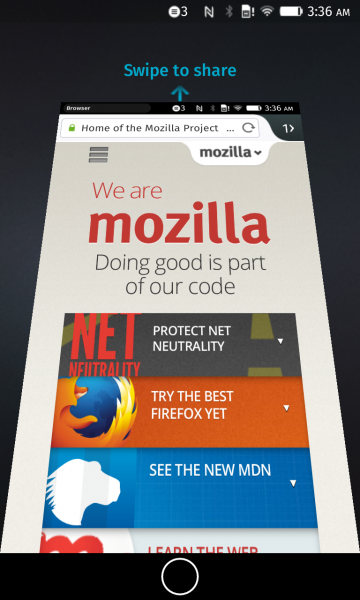
The P2P Sharing UI (Certified/Internal app only)
When an NFCPeer comes into range, and your web app is in the foreground and has registered the onpeerready (needs nfc-share certified/internal permission) callback, the P2P Sharing UI will show the following:
Constructing a MozNFCPeer object
When a peer does come into range of your device , you can then get a MozNFCPeer object to represent the device receiving the data. This is done by grabbing the peer property stored in the event object, as indicated below:
navigator.mozNfc.onpeerfound = function (evt) {
  var peer = evt.peer;
  console.log(peer instanceof MozNFCPeer); // should print true;
};
Sending an NDEF to another MozNFCPeer
With your peer identified, you can now send the data to them via the MozNFCPeer.sendNDEF() method:
// construct the NDEF records to send by creating an array of MozNDEFRecord objects.
var request = peer.sendNDEF(ndefRecords);
Sending a Blob to another MozNFCPeer by NFC handover (Certified/Internal Only)
You can also send a Blob to your peer via MozNFCPeer.sendFile().
// Send blob object.
var request = peer.sendFile(blob);
Once the blob has made it over to the peer, you can then use it in any way you like. Say the blob was an audio sample:
request.result =  function(blob) {
  var audio = document.createElement('audio');
  document.querySelector('body').appendChild('audio');
  var audioURL = window.URL.createObjectURL(blob);
  audio.src = audioURL;
  audio.play();
}
Specifications
The NFC implementation in Gecko follows the NFC Forum specifications, as the current W3C NFC draft doesn't fit all the needs we have for our platform.
Browser compatibility
| Feature | Chrome | Firefox (Gecko) | Internet Explorer | Opera | Safari (WebKit) |
|---|---|---|---|---|---|
| Basic support |
No support |
No support | No support | No support | No support |
| Feature | Android | Firefox Mobile (Gecko) | Firefox OS (Gecko) | IE Phone | Opera Mobile | Safari Mobile |
|---|---|---|---|---|---|---|
| Basic support | No support | No support | 2.0 moz [1] | No support | No support | No support |
[1] Available in privileged apps as of Firefox OS 2.2; certified-only before that.
See also
- Using the NFC API
- Using the NFC emulator
- Understanding NDEF message structure
- Introduction to NFC (fairly long reference doc, featuring general NFC terms, and some Nokia platform specifics.)
- Small example of tag writing app (contains manifest, FirefoxOS 2.1-specific)
License
© 2016 Mozilla Contributors
Licensed under the Creative Commons Attribution-ShareAlike License v2.5 or later.
https://developer.mozilla.org/en-us/docs/web/api/nfc_api/using_the_nfc_api